query: tag:howto
ポジティブ/ネガティブ投票による正しいランキング方法が以下の記事で紹介されています。 [How Not To Sort By Average Rating](http://www.evanmiller.org/how-not-to-sort-by-average-rating.html) この計算方法では、投票数が少ない場合には分散が大きく不正確な評価で、 投票数が多くなるにつれて分散が小さく正確な評価が得られているという事を考慮しています。以下数式 [math] \frac{\hat{p}+\frac{z^2_{\alpha/2}}{2N}\pm{}z_{\alpha/2}\sqrt{ \frac{\hat{p}(1-\hat{p})+\frac{z^2_{\alpha/2}}{4N}}{N} }}{1+\frac{z^2_{\alpha/2}}{N}} [/math] これはScoreの[math]1-\alpha/2[/math]信頼区間を表しています。 この信頼区間の下界をランキングのスコアにすれば良い事になります。 ここで、[math]\hat{p}[/math]は、 
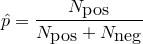
です。全体に占めるポジティブ投票数の割合ですね。 [math]z_{\alpha/2}[/math]は標準正規分布上の [math]1-\alpha/2[/math]信頼区間の有意確率です。 さて、五段階評価によるRatingに同様のテクニックを適用する場合はどうしたらいいでしょうか。 単純に、1回の投票を4度のpositive/negative投票行為だと考えると (例えば星1つは[-,-,-,-], 星3つは[+,+,-,-])、以下のような [math]\hat{p}'[/math]を使えば良さそうです。 [math] \hat{p}'=\frac{\sum_{i\in{[1,5]}}(i-1)N_{i}}{4N} [/math] 従って、最終的にこんな感じになります。 [math] \frac{\hat{p}'+\frac{z^2_{\alpha/2}}{2N}\pm{}z_{\alpha/2}\sqrt{ \frac{\hat{p}'(1-\hat{p}')+\frac{z^2_{\alpha/2}}{4N}}{N} }}{1+\frac{z^2_{\alpha/2}}{N}} [/math] Rubyコードで表すとこんな感じですね。 ruby>> require 'statistics2' def score(ni, alpha) n = ni.inject(&:+) return 0 if n == 0 m = ni.size z = Statistics2.pnormaldist(1-alpha/2) phat = m.times.zip(ni).inject(0){|s,(i,j)| s + i*j}/((m - 1.0)*n) (phat + z*z/(2*n) - z*Math.sqrt((phat*(1-phat)+z*z/(4*n))/n))/(1+z*z/n) end <<--
posted by genki genki on Sun 10 May 2009 at 09:48 with 0 comments

Hello, Merbists!

Today, I explain how to develop Merb apps that runs on GAE/J environment by using dm-datastore-adapter.

First of all, here is whole source code of an example app. Please check it out.

After checking it out,
you must edit appengine-web.xml file. Open it by editor and change the application name to yours.
And then you should make war directory by typing this command.

pre>>
MERB_ROOT% jruby -S warble war
<<--

It generates files under tmp/war.

So far, you are ready to deploy this app to GAE/J
Of course, you need an account of GAE/J to do it. Please get it in advance :-)

Let us go to deploy by this command.

pre>>
MERB_ROOT% appcfg.sh update -e {youraccount@gmail.com} tmp/war
<<--

This process takes a time for the first time.
If the log didn't say any errors, you got success!

Now your first Merb app on GAE/J is here at
http://{your app name}.appspot.com/

Congrats!

Further improvement is your home work :-p

APPENDIX

All required gems are being packed into jar file located at lib/merb.jar.
This enables you to pass the limit of which you can upload only 1000 files to GAE.
If you add more gems to the jar file, you can do it like this

  • unpacking it
  • add gems
  • and repack it

Enjoy!

posted by takiuchi takiuchi on Fri 24 Apr 2009 at 07:54 with 2 comments

RailsのCacheSweeperは非常に便利なのですが、
callbackからコントローラのインスタンス変数にアクセスできると
もっと便利になる気がします。

ソースコードを読んでみたら、やっぱりみんなそう思うようで、
assignsメソッドが用意されていました。

rails>>
class PostsSweeper < ActionController::Caching::Sweeper
observe Post

def after_posts_rating
expire_fragment "posts/show/#{assigns(:post).id}"
end
end
<<--

こんな風に書けます。これは便利。

posted by genki genki on Thu 29 Jan 2009 at 06:03 with 0 comments

Generatorプラグインを作る方法はこちらの
Generatorプラグインの作り方
を参照していただくとして、今回はGenerator Gemの作り方を紹介します。

Generatorの実装自体は、基本的にはプラグインと同様でOKです。
Generatorプラグインの場合、
vendor/plugins/foo_generator/generators/foo/
以下にfoo Generatorを置くのですが、Generator Gemの場合は
foo/以下をそのままGemのルートディレクトリに持ってきます。
つまり、以下のような感じのファイル構成になります。

sh>>
[GEM_ROOT] % ls
foo_generator.rb templates/ README.txt
<<--

注意すべき点は以下の二つです。

  • Gemの名称はfoo_generatorでなければならない。これは、RailsがGenerator GemをLookupするのにGem名のパターンマッチを行っているからです。
  • foo_generator.rbの先頭で、Generatorの既定クラスの定義をrequireする。例えば、Rails::Generator::NamedBaseの派生Generatorを作るのであれば、先頭に以下を加えます。
    ruby>>
    require "rails_generator/base"
    <<--

あとはGemを作ってインストールすればOK。
./script/generate -hを実行して、作ったGemが
Installed Generators / Rubygems: の項に入ってるかどうか確認してみましょう。

posted by genki genki on Sun 13 Apr 2008 at 12:07 with 0 comments

数年に渡ってメンテナンスされているようなRailsアプリケーションの
config/routesは、
徐々にスパゲッティ化していく傾向があるように思えます。
ということで、今回は、
コントローラごとにRoutesをまとめて綺麗に記述する方法を紹介します。

方法は簡単です。with_optionsを使って、
prefixオプションを指定するようにします。

rails>>
map.with_options(:controller => 'posts',
:name_prefix => 'posts_',
:path_prefix => 'posts') do |posts|

posts_rss_path => 'posts/rss'

posts.rss 'rss', :action => 'rss'
end
<<--

しかし、全部のControllerにこれを書くのは面倒かもしれません。
ということで、プラグインを作りました。

このプラグインを使えば、以下のようにRoutesを書くことができます。

rails>>
map.with_controller('posts') do |posts|
posts.rss # posts_rss_path => 'posts/rss'
end
<<--

map.namespace(:posts)を使うと似たようなことができるのですが、
これは名前空間の作成に特化されているので、
今回の目的のために使用すると、若干思わしくない挙動をするようです。

posted by genki genki on Fri 14 Mar 2008 at 22:30 with 0 comments

I think that the complex Rails applications
such as maintained over years tend to have messy config/routes.
Today I'd like to introduce a simple way to keep them clean.

The way is really simple. Use with_options for each controller with prefix options.

rails>>
map.with_options(:controller => 'posts',
:name_prefix => 'posts_',
:path_prefix => 'posts') do |posts|

posts_rss_path => 'posts/rss'

posts.rss 'rss', :action => 'rss'
end
<<--

Still complex?
Okey, I have written the plugin for you.

With this plugin, you can draw the routes belonging to some controller like this.

rails>>
map.with_controller('posts') do |posts|
posts.rss # posts_rss_path => 'posts/rss'
end
<<--

As you can see, there's one more thing.
I have also installed MapperWithController class into RouteSet at this plugin for making named routes be completely DRY.

rails>>
class MapperWithController
def initialize(mapper)
@mapper = mapper
end

def method_missing(name, *args, &block)
path, *args = args
path ||= name.to_s
args.unshift path
@mapper.send name, *args, &block
end
end
<<--

map.namespace :posts does nearly same thing, but it couldn't be used for this purpose because of it is optimized to making namespaces for a routing.

posted by takiuchi takiuchi on Fri 14 Mar 2008 at 19:00 with 0 comments

apt-get install git-coreですんなり終わるかと思っていたら、
GNU Interactive Toolsというのと競合してるらしく、
以下のようなメッセージが出てきます。

pre>>
git, the filemanager with GNU Interactive Tools, is now called gitfm.

If you are looking for git, Linus Torvald's content tracker, install
the cogito and git-core packages and see README.Debian and git(7).

This transition script will be removed in the debian stable
release after etch.

If you wish to complete the transition early, install git-core
and use (as root):
update-alternatives --config git

Press RETURN to run gitfm
<<--

指示の通り、update-alternatives --config gitを実行すると、
今度はこんな感じのメッセージが出るので、

pre>>

update-alternatives --config git

There are 2 alternatives which provide `git'.

Selection Alternative

*+ 1 /usr/bin/git.transition
2 /usr/bin/git-scm

Press enter to keep the default[*], or type selection number:
<<--

2の/usr/bin/git-scmを選択します。

これでGitを使えるようになりました。

posted by genki genki on Thu 28 Feb 2008 at 10:14 with 0 comments

Thin
は、最近話題の軽量・高速が売りのWebサーバです。

Thin is a Ruby web server that glues together 3 of the best Ruby libraries in web history:

  • the Mongrel parser, the root of Mongrel speed and security
  • Event Machine, a network I/O library with extremely high scalability, performance and stability
  • Rack, a minimal interface between webservers and Ruby frameworks

ということで、
RailsアプリケーションでThinを使う方法をメモしておきます。
何はともあれ、まずはsudo gem install thin
thinをインストールします。
あとは、RAILS_ROOTで

shell>>
$ thin start
<<--

するだけでOKです。非常に簡単です。
thinコマンドのオプションは以下の通り。

pre>>
Usage: thin [options] start|stop|restart

Server options:
-a, --address HOST bind to HOST address
(default: 0.0.0.0)
-p, --port PORT use PORT (default: 3000)
-e, --environment ENV Rails environment
(default: development)
-c, --chdir PATH Change to dir before starting
-s, --servers NUM Number of servers to start
set a value >1 to start a cluster
-d, --daemonize Run daemonized in the background
-l, --log FILE File to redirect output
(default: log/thin.log)
-P, --pid FILE File to store PID
(default: tmp/pids/thin.pid)
-t, --timeout SEC Request or command timeout in sec
(default: 60)
-u, --user NAME User to run daemon as (use with -g)
-g, --group NAME Group to run daemon as (use with -u)

Common options:
-D, --debug Set debbuging on
-h, --help Show this message
-v, --version Show version
<<--

見ての通り、デフォルト設定はRailsアプリケーションに
最適化されています。

posted by genki genki on Sat 16 Feb 2008 at 12:48 with 0 comments

原因については調査し切れていないのですが、何らかの理由で
RubyGemsをインストールしたときに、Gemのバージョン番号の末尾に
本来あるはずの無い「-」がついた状態でインストールされてしまう
事があるようです。

この問題が発生すると、「-」が付加されたバージョンのGemの存在が
正しく認識されず、ひとつ古いバージョンが中途半端にactivateされて
しまい、全体としてアプリケーションが正常に動作しなくなる
事があるようです。

一旦問題の発生しているGemを削除してから、再度インストールを
行うことで問題は解決しますが、gem uninstallコマンドでは
正常にアンインストールが行われない場合もあるようです。
その場合は、RubyGemsがインストールされているディレクトリ
/usr/local/lib/ruby/gems/1.8/gems/など)から手作業で
該当するファイル群を削除する必要があるかもしれません。

posted by genki genki on Mon 4 Feb 2008 at 01:25 with 0 comments

lighttpd-1.5.xから導入される予定のmod_deflateは、
static/dynamicを問わず、レンダリング出力を
圧縮してくれる便利なモジュールですが、
残念ながらlighttpd-1.4.x系では使うことができません。

しかし、非常に便利な機能なので、1.5.x系から
バックポートするための様々な試みがなされています。
今回は、lighttpd-1.4.8にパッチを当てて
mod_deflateを使う方法を紹介します。

以下のようにlighttpd-1.4.8のソースと、パッチを
ダウンロードし、パッチを適用します。

shell>>

cd /usr/local/src

wget http://www.lighttpd.net/download/lighttpd-1.4.18.tar.bz2

tar xvjf lighttpd-1.4.18.tar.bz2

cd lighttpd-1.4.18

curl http://poocs.net/files/lighttpd-1.4.18.mod_deflate.scoop.patch.gz | gzip -d | patch -p1

<<--

あとは、通常通りソースからインストールすれば完了です。

shell>>

./configure --with-bzip2

~ (snip) ~

enabled:
auth-crypt
compress-bzip2
compress-deflate

~ (snip) ~

make

make install

<<--

mod_deflateの使い方は、こちらのサイトをご覧ください。

posted by genki genki on Sun 13 Jan 2008 at 07:43 with 0 comments

You can see also http://blog.s21g.com/articles/212, the article written about the same theme for
comparison, if you are familiar to Japanese.

1. p/pp

This is a very popular method used not only in Rails but also in other
debugging. In Rails this method should be used on web server which is in the states of foreground process.

shell>>
$ ./script/server
<<--

If you are familiar with p/pp, it should be simple and easy.

2. logger.debug

For logger.debug, the following example will explain fully.

rails>>
logger.debug "something interesting information"
<<--

Calling logger.debug, you can create a log file of
log/$RAILS_ENV.log such as log/development.log.

By configuring the output file to:

shell>>
$ tail -f log/development.log
<<--

you can check the debug output log in the same manner as in p/pp debugging.
Furthermore, as the result is output in a log-file format, you can
refer it later on.

3. script/console

script/console comes in handy when you check the DB contents during
the operation. Executing "script/console" command, irb
launches after confirming Rails environment.
You can change DB as you like by using ActiveRecord, such as find,
create and destroy_all.This is very tactful feature.

4. script/breakpointer

As previously described, although script/console
comes in very handy and tactful, it can not check session status
during the action.
In that case, you can use "script/breakpointer" for it.

shell>>
$ ./script/breakpointer
<<--

Please make sure to launch a breakpointer initially.
Then locate a "breakpoint" to the position where you want to check
the status.

rails>>
class FooController < ApplicationController
def bar
# something
breakpoint
# something
end
<<--

Then you execute bar action through brower access and check and
manupulate the necessary information
after the launch of irb at the set breakpointer.

5. better rails debugger

script/breakpointer is very useful but it has a weak point
as it cannot operate step execution.
We understand you rarely experience the need for step execution,
however, it's better to have a method than nothing. The ruby-debug
Gem, informed by yugui in the last Rails meeting, will meet the need.
First of all, make sure to install ruby-debug in advance.

shell>>

gem install ruby-debug

<<--

Then, add a breakpoint.

rails>>
class FooController < ApplicationController
def bar
# something
debugger
# something
end
<<--

After launching Web server such as Webrick or Mongrel on foreground,
which is used in p/pp debugging,
you make an access to execute targeted code through the browser. Then
something similer to debug.rb launches in Web server process.
Now you can start debuggin in the same manner as you do with
general ruby script.

6. test/autotest

In Ruby on Rails, test framework is ready to use by default.
Generally, specification is designed after writing a test code in test
operation development.
However, you can write a test code for
verification of desired behavior and also utilize it for debugging.
It takes time to operate every test by using "rake" command, I
recommend to use autotest in ZenTest.This autotest operates only
related tests for modified files, and can provide quicker response
than using "rake" command.
If you use a redgreen as a combination, the smooth operation will
please you while debuggin.

7. tail -f log/development.log&; autotest

Lastly, let me intriduce my current method.I launch a separate
terminal other than for development, and operate following command in
RAILS_ROOT.

shell>>
$ tail -f log/development.log&; autotest
<<--

This arrangement enables to display the autotest output in editing
program and test code
and the logger output when there is an access from the browser.
Basically, those two runs asynchronously, you can fully use one
terminal.

posted by genki genki on Fri 4 Jan 2008 at 05:23 with 0 comments