[Scala] playframework2.0での開発環境構築
Scalaのplayframework2.0を使って開発することになったので、ローカルのWindows環境の構築手順をメモ。
sbtインストール
- 下記URLから sbt-launch.jar をダウンロードします。
- 任意のディレクトリに sbt-launch.jar を置いて、同じディレクトリ内に下記の内容で sbt.bat を作成します。
sh>>
set SCRIPT_DIR=%~dp0
java -Xmx512M -jar "%SCRIPT_DIR%sbt-launch.jar" %*
<<--
- 上記ディレクトリにパスを通し、sbt コマンドで起動します。
sh>>
C:\Users\akanuma>sbt
C:\Users\akanuma>set SCRIPT_DIR=C:\sbt\
C:\Users\akanuma>java -Xmx512M -jar "C:\sbt\sbt-launch.jar"
Getting net.java.dev.jna jna 3.2.3 ...
downloading http://repo1.maven.org/maven2/net/java/dev/jna/jna/3.2.3/jna-3.2.3.jar ...
[SUCCESSFUL ] net.java.dev.jna#jna;3.2.3!jna.jar (13985ms)
:: retrieving :: org.scala-tools.sbt#boot-app
confs: [default]
1 artifacts copied, 0 already retrieved (838kB/106ms)
Getting Scala 2.9.1 (for sbt)...
~~~ 中略 ~~~
[info] Resolving org.scala-tools.sbt#precompiled-2_8_1;0.11.2 ...
[info] Resolving org.scala-tools.sbt#precompiled-2_8_0;0.11.2 ...
[info] Resolving org.scala-tools.sbt#precompiled-2_9_0;0.11.2 ...
[info] Done updating.
[info] Set current project to default-83bb15 (in build file:/C:/Users/akanuma/)
<<--
Play2.0インストール
- 下記サイトから play-2.0.zip をダウンロードします。
- 任意の場所で解凍してパスを通し、playコマンドでインストールします。
sh>>
C:\Users\akanuma>play
Getting net.java.dev.jna jna 3.2.3 ...
:: retrieving :: org.scala-tools.sbt#boot-app
confs: [default]
1 artifacts copied, 0 already retrieved (838kB/510ms)
Getting Scala 2.9.1 (for console)...
:: retrieving :: org.scala-tools.sbt#boot-scala
confs: [default]
4 artifacts copied, 0 already retrieved (19939kB/3195ms)
Getting play console_2.9.1 2.0 ...
:: retrieving :: org.scala-tools.sbt#boot-app
confs: [default]
4 artifacts copied, 0 already retrieved (1472kB/566ms)
_ _
_ __ | | __ _ _ | |
| ' | |/ ' | || ||
| /||_|__ ()
|| |__/
play! 2.0, http://www.playframework.org
This is not a play application!
Use play new to create a new Play application in the current directory,
or go to an existing application and launch the development console using play.
You can also browse the complete documentation at http://www.playframework.org.
<<--
- アプリケーション用の任意のディレクトリで play new コマンドでアプリケーションを作成します。ここでは play_new_sample ディレクトリで sample という名前のアプリケーションを作成します。
sh>>
C:\play_new_sample>play new sample
_ _
_ __ | | __ _ _ | |
| ' | |/ ' | || ||
| /||_|__ ()
|| |__/
play! 2.0, http://www.playframework.org
The new application will be created in C:\play_new_sample\sample
What is the application name?
sample
Which template do you want to use for this new application?
1 - Create a simple Scala application
2 - Create a simple Java application
3 - Create an empty project
1
OK, application sample is created.
Have fun!
<<--
- コマンドを実行したディレクトリにアプリケーション名のディレクトリが作成されますので、その中に移動して play run コマンドでアプリケーションを起動します。
sh>>
C:\play_new_sample\sample>play run
Getting org.scala-tools.sbt sbt_2.9.1 0.11.2 ...
:: retrieving :: org.scala-tools.sbt#boot-app
confs: [default]
37 artifacts copied, 0 already retrieved (7324kB/3942ms)
[info] Loading project definition from C:\play_new_sample\sample\project
[info] Set current project to sample (in build file:/C:/play_new_sample/sample/)
[info] Updating {file:/C:/play_new_sample/sample/}sample...
[info] Done updating.
--- (Running the application from SBT, auto-reloading is enabled) ---
[info] play - Listening for HTTP on port 9000...
(Server started, use Ctrl+D to stop and go back to the console...)
<<--
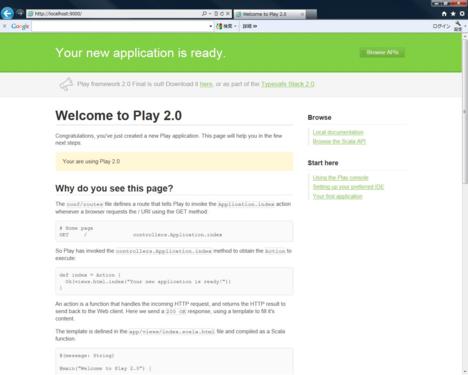
- ブラウザでlocalhostの9000番ポートにアクセスして起動を確認します。
local に scala を直接インストールしていないせいか、sbt の run コマンドだとアクセス時に 「scala.tools.nsc.MissingRequirementError: object scala not found.」 が発生しました。
アプリケーションをEclipseプロジェクトにするには play eclipsify コマンドを実行します。
sh>>
C:\play_new_sample\sample>play eclipsify
[info] Loading project definition from C:\play_new_sample\sample\project
[info] Set current project to sample (in build file:/C:/play_new_sample/sample/)
[info] About to create Eclipse project files for your project(s).
[info] Successfully created Eclipse project files for project(s): sample
<<--
EclipseでScalaの開発をするためのプラグインとして、Scala IDE for Eclipse があります。Eclipse3.6(Helios)が正式サポート対象で、3.7(Indigo)では一部動作しない機能があります。
Eclipse の Helpメニュー > Install New Software から下記URL(Scala 2.9.x用)を指定してプラグインをインストールします。
http://download.scala-ide.org/releases-29/stable/site
- Scala2.8.xの場合は下記URLになります。
http://download.scala-ide.org/releases-28/stable/site
- これでひとまずアプリケーションの作成はできましたので、必要なロジックを作りこんでいくことになります。